A desert tortoise burrow in Las Vegas needs a dry location and a design that fits both the tortoise and the yard. Before buying materials or digging, check where rainwater and irrigation drain. Measure the clear space around the proposed burrow, then choose a construction plan that fits the site.
This guide is for homeowners building or replacing a burrow for a captive Mojave desert tortoise in Southern Nevada. It covers planning the work, spotting problems before construction, and knowing when to ask for help.
Tortoise Group’s burrow guidance describes how a burrow protects a tortoise from temperature extremes and predators. The type of burrow depends on the space available, the tortoise’s size, and the soil.
Choose the burrow location early in the yard layout. If you wait until the plants, paving, and irrigation are in place, the corner left over may be unsuitable.
Sketch the burrow alongside the rest of the habitat. Include walls, gates, planting beds, irrigation lines, roof runoff, and paths you need for maintenance. A rough drawing is fine if it shows where everything sits. A photograph alone may not show those relationships.
Start with Tortoise Group’s Habitat Checklist for One Tortoise. It specifies a completely dry area of at least 15 by 15 feet, with the burrow at least 5 feet from walls, sidewalks, and plants on all sides. It also calls for both sun and shade elsewhere in the habitat.
The organization’s general burrow webpage lists a smaller, 10-by-10-foot dry area. Use the more conservative checklist figure when planning, and confirm the layout with Tortoise Group before building. Both figures describe the surrounding dry area, not the inside of the burrow.
Measure the whole space. A mound may appear to fit but leave too little clearance behind it. In a narrow side yard or a heavily landscaped backyard, you may need to change the surrounding layout to make room.
Tortoise Group recommends a south, southeast, or southwest-facing entrance. Its guidance also says to account for the direction a tortoise could extend the tunnel, avoiding wet areas, neighboring property, and the space beneath your house. Read the placement guidance.
Mark the entrance direction on your sketch, then walk the site. Check where the rest of the burrow would sit and what lies beyond it. You need to check the whole footprint as well as the compass bearing.
The habitat checklist says roof and yard drainage must not enter the burrow. Start by tracing water from the house, patio, nearby beds, and irrigation outlets. Look for low spots, signs of ponding, and soil that stays wet after watering. Tortoise Group habitat checklist.
Before choosing a location, check:
Planting can change how you water the yard. Include the finished landscape in your drainage plan, even if the space is bare when you start.
For a DIY build, follow the drainage details in your chosen plan. Tortoise Group’s underground wood-frame instructions describe an entrance above surrounding ground level and a gently mounded finish that sheds rain. Follow the construction underneath that mound, too. Copying its shape alone does not reproduce the design.
Tortoise Group publishes plans for both an underground wood-frame burrow and an above-ground wood-frame burrow.
The underground plan places the frame in an excavation and finishes it with a soil mound. The above-ground plan places the structure on level or slightly raised ground and covers it with a substantial soil mound. Both plans include a channel fitted to the tortoise, a covered structure, and entrance details.
Here’s how the site work differs:
| Planning question | Underground plan | Above-ground plan |
|---|---|---|
| What site work is involved? | Excavation for the frame, followed by backfilling and covering | Ground preparation, followed by construction and soil placement |
| What should you account for? | Digging access, soil conditions, and the finished drainage route | Soil delivery, the mound’s footprint, and the finished drainage route |
| Where are the construction details? | Underground care sheet | Above-ground care sheet |
The above-ground plan includes an earth-covered structure. It should not leave the box exposed. Choose a complete plan with local guidance instead of combining pieces from unrelated online tutorials. A plan for another species or climate may not suit a Mojave desert tortoise in Las Vegas.
Tortoise Group’s Soil for Covering a Tortoise Burrow care sheet calls for unwashed soil that retains fine particles. It advises against soil containing organic matter for the burrow cover. The soil needs to be workable during digging but firm enough to resist collapse.
Show the supplier the care sheet and your chosen plan before ordering. Confirm the material and quantity rather than picking whichever planting mix is in stock. The soil specified for the burrow may differ from what you use in planting beds.
The wood-frame plans explain how to fit the channel to your tortoise. They warn against gaps that could catch its nails and screws that protrude into the interior. Check these details before covering the structure, when you can still see and fix them. Underground assembly instructions.
If you’re adopting through Tortoise Group, both assembly sheets tell you to arrange an inspection before attaching the top. Allow for that inspection before booking soil delivery or finishing the mound. Confirm the current arrangements with the organization.
Plan for summer across the whole habitat. Follow the checklist’s sun-and-shade requirement when placing the shelter, and account for any planting or shade structures you intend to add. The entrance location is only one part of that work.
Check the burrow’s condition and drainage before winter, while there’s still time to arrange repairs. Look for damage, displaced cover, and changes to nearby irrigation. If you’re replacing the burrow, plan where the tortoise will stay during the work.
Tortoise Group provides separate brumation guidance when an outdoor burrow is unavailable, including when a burrow floods or is unfinished. Ask for guidance before making a temporary winter arrangement. Whether your tortoise is ready to brumate is an animal-care question that this construction guide cannot answer.
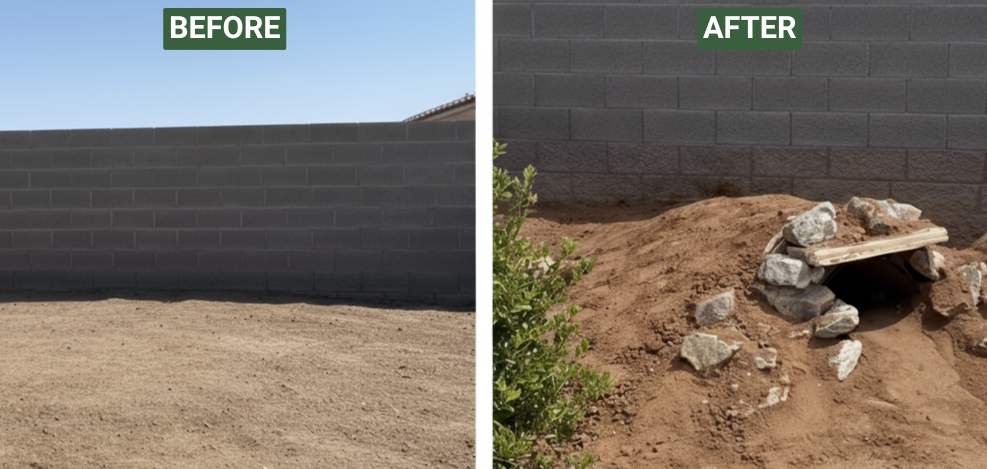
Habitat Hut project photo: an open yard before construction and a soil mound with a stone-framed entrance afterward.
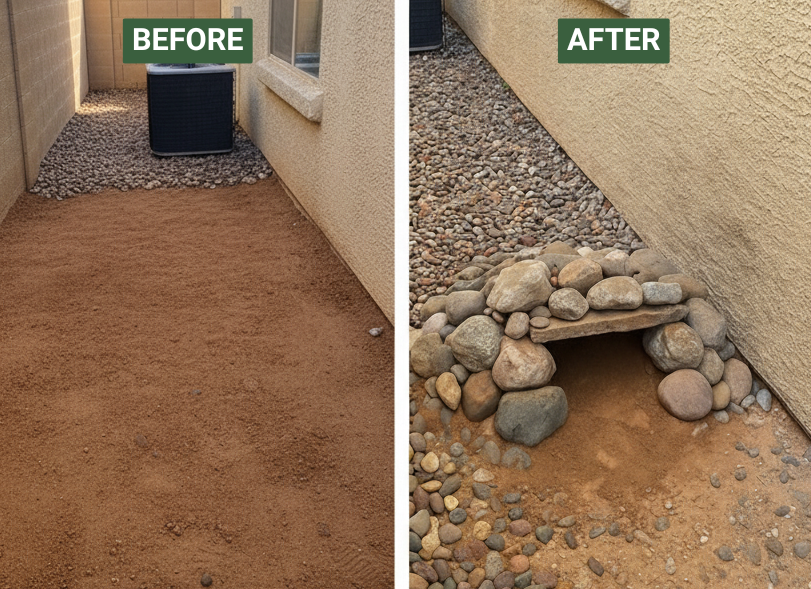
Habitat Hut project photo: a side-yard shelter entrance with rocks and a flat slab above the opening.
These photos show the finished entrances. You can’t use them to assess the internal construction, orientation, drainage, or clearances required by Tortoise Group. Check placement against measured plans and the habitat checklist. You can also view Habitat Hut’s project gallery.
Check placement before choosing an entrance style, and include existing irrigation in the plan. Fit the dimensions to your tortoise and arrange any inspection before covering the structure. It’s easier to change a drawing than a finished mound.
Consider construction help if the project involves excavation, soil delivery, drainage changes, or alterations to an existing yard. Bring measurements, wide-angle yard photos, irrigation details, and the plan you’re considering. Ask how the work will address each item. Take animal-care and adoption questions to Tortoise Group or your reptile veterinarian.
If you need a desert tortoise burrow built or replaced in Las Vegas, request a free quote from Habitat Hut. Tell us about your yard and the work you need, and we’ll get in touch to discuss it.
Tell us about your yard and what you'd like to build. We'll get in touch to talk through the project and your free quote.